This post contains affiliate links.
Power Wheels are beloved by children and adults as a fun and safe way for kids to motor around in their own miniature electric ride-on car, but what if the existing Power Wheels setup could be made even safer? Well, with just a little bit of work, safety lighting can be easily added to almost any Power Wheel rig.
Those that want to add lighting to a Power Wheels car can do so easily with an aftermarket kit. Installing such a kit typically requires minimal tools, no soldering, and some cutting of plastic. Installation typically can be accomplished in as little as one hour, if common mistakes are avoided.
Of course, installing lights on a Power Wheels car is easier said than done. So, stick around, as I will tell you everything you need to know, from common mistakes to pro tips! We’ll go over all that and more in our Ultimate Guide to adding lights to your ride-on car.
How to Add Lights to your power wheels vehicle

Adding lights to Power Wheels can be a simple enough task, as long as enough forethought and preparation are given ahead of time. Therefore, it is important to gather all of your tools and equipment ahead of time and make sure you are familiar with whatever plans or instructions have come with your lighting kit.
Once you are ready to install your LED lights, simply follow these steps:
Survey the situation – determine where the lights should go
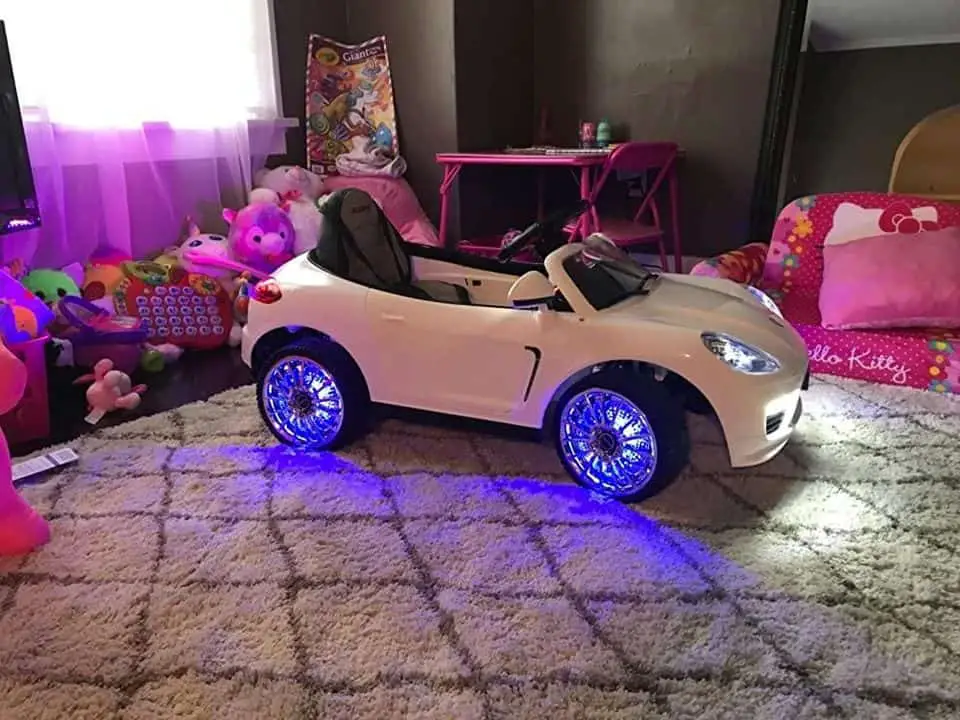
The first step you should take is to figure out exactly what you are dealing with when it comes to your own lighting and ride-on car. Will you put your LED strips in the front of the Power Wheels to mimic LED headlights, or will you place the lights under the body of the Power Wheels to give the pavement a colorful glow? Decide which might work best based on your own situation.
Prepare your Power Wheels for modifications
Prepare your Power Wheels car by removing any batteries or power supply. Take the ride-on car to a nice clear area where you will have plenty of room to work around it and get a little messy—a garage or basement is recommended.
Make incisions in the vehicle
After carefully considering the placement of your LED light strips, it is time to make your first cuts through the car’s plastic. This is best accomplished by using an Exacto knife to score the area you are trying to cut a few times beforehand. You can also use a utility knife or a fine-toothed saw for more precision.
Wire your lights to a power source
Before wiring anything to your Power Wheel’s existing circuitry, it is best to check to make sure it will be able to provide enough juice for your new lights. While LED lights are normally very energy efficient, even slight changes in the amount of electricity drawn can have a huge impact on your Power Wheels car’s capabilities. For this reason alone, it is normally recommended to attach new LED lights to a separate battery supply.
Attach your lights to the car
Once your LED lights are attached to their power source, you can safely adhere them to the vehicle. This can be accomplished by using a simple mount or clip. Additionally, super glue or duct tape can be good options as well.
Tuck everything away – no stray wires!
Make sure no wires are left exposed or vulnerable. A snagged wire will often break and cause lights to stop working. Glue or tape can be used to help keep them in good working condition.
Final safety check – everything good to go?
Before letting a child use their newly modified Power Wheel, it is always important to do a final safety check. This can include making sure that there is nothing that has happened to impede the car from properly steering, accelerating smoothly, or (of course) safely breaking. This can also be a good time to make sure that there are no rough or sharp edges of the plastic and to sand down any problem spots to ensure the entire Power Wheels car is in good working condition.
And there you have it, a Power Wheels rig with a brand-new lighting system! Hopefully, you now have come to agree that the process is relatively simple and painless. Of course, some common mistakes should be avoided which I will look at in the next section.
Common Mistakes to Avoid When Adding LED Lights to Power Wheels
As much fun as Power Wheels cars can be for kids, ask any parent who has one, and you will soon find that they break pretty easily and often can spend as much time disabled in the yard as they do being driven to the local park. To try to avoid causing more problems, I have compiled a few of the most common mistakes below:
Check the Manual First
The first thing you should do before starting any work on your Power Wheels car is to make sure you have looked over all the information in its manual. Consulting a manual like this one will give you important technical specifications and help you troubleshoot common problems as they crop up.
Not Ensuring the Right Fit
One of the most common mistakes that are made in this process is getting any old lighting kit and not taking the time to make sure that it will be a proper fit for your particular Power Wheels vehicle. Save yourself time and frustration by checking the sizes of both your car and any potential lights before you make a purchase or begin your installation.
Going Too Big
Sometimes in our attempts to please our children, we can bite off a little more than we can chew. In such a case, we may think that we can easily convert an old Power Wheels car into a Jurassic Park Jeep (like this one), but often this is a little bit of a bigger project than most can handle. This is why it can be important to keep your expectations grounded.
By keeping these common mistakes in mind, you’ll be able to ensure an easy installation and avoid simple errors. Lastly, I am going to offer some pro tips to kick any installation up a notch.
Pro Tips for Adding LED Lights to Power Wheels

While I have discussed some of the most common mistakes that are made when installing LED lights on a Power Wheel, next, I will look at some tips to help save you money and make your Power Wheels car the highlight of the neighborhood!
- Paint over your lighting installation: Matching quality latex paint will help seamlessly blend any cosmetic changes you have made into the exterior of your car.
- Save some money, buy your own LED lights: A colored LED pack from Autozone can run you for approximately $14 and can be installed just as easily as the pre-packaged kits that can be found online.
- Involve the kids: If your child is able to, involving them in the modification of their favorite electric toy can be a great way to introduce them to age-appropriate engineering concepts.
And this is just the beginning, the world of Power Wheels modding is surprisingly deep, and the only true limit on what you can bring to your child’s vehicle is imagination.
Final Word: Lighting Up Power Wheels for Good
So, now you know nearly everything there is about installing lighting on a Power Wheels car. I’ve discussed installation, common problems to avoid, and even offered some tips to help make any car stand out. I hope you’ve learned something new and enjoyed yourself along the way. As always, be sure to reach out with any questions or comments you may have, and thank you for reading!

